How to Customize Salesforce Lightning Home Page
- Why Customize Your Salesforce Lightning Home Page?
- How to Customize Salesforce Lightning Home Page
- Step 1: Switch to Lightning
- Step 2: Load your home page
- Step 3: Edit page
- Step 4: Drag and drop
- Step 5: Add dashboards
- Step 6: Choose your preferred elements
- Step 7: Save your work
- Step 8: Activate customizations
- Some Tips to Consider When Customizing Your Salesforce Lightning Home Page
- 1. Make sure to add the valuable components to your home page
- 2. Avoid overloading your home page with too many components
- Conclusion
- Frequently Asked Questions
The SalesForce Lightning home page is the first thing users will see upon launching the Salesforce platform. You’re free to customize this page to ensure your users have easy access to all their work essentials. And if you don’t know how to customize this page, here’s a helpful guide that can help you below.
Why Customize Your Salesforce Lightning Home Page?
As previously mentioned, customizing your SalesForce Lightning home page ensures that your users can immediately access all their work. You can change portions of this page to emphasize particular info to your users. Efficiently editing your page to highlight these parts is the key to increasing your worker’s efficiency.
You can customize this part of Salesforce with the help of the Lightning App Builder. But before you can begin customizing your home page, you must first use the platform’s Lightning Experience User Interface.
How to Customize Salesforce Lightning Home Page
Salesforce Lightning makes it easy to build responsive apps for any device, includes the Lightning Component Framework and helpful developer tools.The modern user interface for salesforce home is optimized for a fast and responsive design across all devices.Are you wondering how to customize this part of Salesforce? Here’s a step-by-step guide on how to edit your SalesForce Lightning Home Page below:
Step 1: Switch to Lightning
As stated above, make sure you’re already utilizing Salesforce’s Lightning Experience User Interface to make the possible changes to your home page.
To do this, click on the arrow button on the right side of your profile (where your display name is shown) to launch the drop-down menu. From there, choose the option “switch to Lightning Experience.”
Step 2: Load your home page
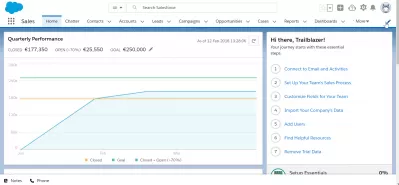
The Lightning Experience User Interface will now load onto your screen. Once it’s done loading, locate the Home page in your organization’s Salesforce workspace.
Step 3: Edit page
Next, visit Setup and choose the “Edit Page” option. Picking this option launches the Lightning App Builder. From here, you will see the freshly edited pages in the Pages tab. Meanwhile, the left portion of the screen will show you the usable components.
You can also use the back button to redirect yourself to the Home area. However, do take note that doing this action will forfeit any changes you made. Furthermore, you can also freely put reports, dashboards, and various shortcuts to the page’s designated List Views.
Step 4: Drag and drop
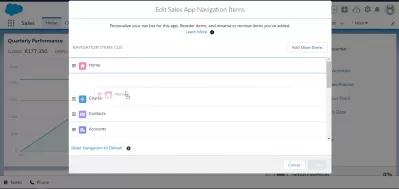
Pick the components you wish to add by dragging and dropping them to their corresponding areas on your Home Page.
Step 5: Add dashboards
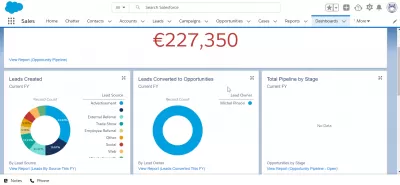
If you’re adding dashboards to your home page, you can choose which dashboards you’d like to show up. Moreover, you can also adjust its height or put it out of sight in case it contains errors.
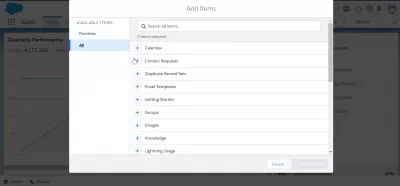
Step 6: Choose your preferred elements
You can add extra details to the List Views you’ll add to your Home page. For instance, you can choose your preferred filters, objects, and the list of records you want to show. You also have the option of keeping the action bar hidden or enabling inline edits.
Step 7: Save your work
If you’re satisfied with your customizations, save your work by clicking the Save button.
Step 8: Activate customizations
Finally, select the Activate option to implement these customizations on your organization’s Home page. You can implement these customizations for all of your organization’s members or set them for particular users only.
Some Tips to Consider When Customizing Your Salesforce Lightning Home Page
1. Make sure to add the valuable components to your home page
Salesforce is loaded with a wide variety of highly valuable components that can help make things easier to manage in your workspace. If you’re not sure which components to add when editing your home page, here are a few recommendations you can consider:
- Today’s Events and Today’s Tasks Components: Lists showing the events and tasks scheduled for the said day
- Homepage Assistant Component: Shows a maximum of ten critical updates about leads and opportunities that need to be followed up or attended to
- Recent Records Component: Shows the last records you previously accessed
2. Avoid overloading your home page with too many components
You’re free to add as many components to your home page. However, note that adding too many components will negatively affect the page’s performance. So, make sure to limit the number of components you need to add.
Conclusion
This ends the guide on how to customize the SalesForce Lightning Home Page. Once again, editing this part guarantees that you have an organized and easy-to-understand workspace for your users. And thanks to the vast selection of edits and components you can do to the SalesForce Lightning Home Page, you can excellently set up a home page that best suits your organization’s needs and preferences.
Frequently Asked Questions
- How does customizing the Salesforce Lightning home page improve user efficiency?
- Customizing the home page allows users to have quick access to the most relevant tools and data, enhancing workflow efficiency and user experience.
